After Effects Tutorials
|
Workspace Orientation
|
Importing Photoshop Files
|
Animate using keyframes
Animating elements in After Effects brings the visuals to life. Keyframes are the key to creating interesting visual animations
Animating elements in After Effects brings the visuals to life. Keyframes are the key to creating interesting visual animations
Keyframe Tutorials
|
Easy Ease - realistic motion
Source: https://youtu.be/12-M1E5djP4
|
Adding Motion Blur
|
Using the Graph Editor
Controlling the speed "influence" (characteristics) of animations
Controlling the speed "influence" (characteristics) of animations
Adding Text, Working with Shapes
Masking Text with shapes and other great effects
Learn these basic concepts to be come an After Effects master!
Masking Text with shapes and other great effects
Learn these basic concepts to be come an After Effects master!
|
EC Abrahams https://www.youtube.com/user/ECAbrams
He is an excellent resource on Youtube to learn a wide variety of visual effects. His tutorials tend to be for people who already have a basic knowledge of After Effects. Check him out online. |
Creating a custom Transition with Shapes
Source: https://www.youtube.com/watch?v=EtaUU-GyB0M&t=59swww.youtube.com/watch?v=EtaUU-GyB0M&t=59s
|
Render After Effects project as a video file
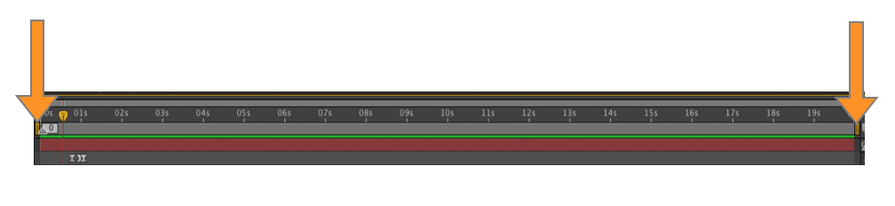
Step 1: Make sure your work area bar stretches along the entire length of your composition
(The 2 orange indicators along the top of the timeline)
Step 1: Make sure your work area bar stretches along the entire length of your composition
(The 2 orange indicators along the top of the timeline)
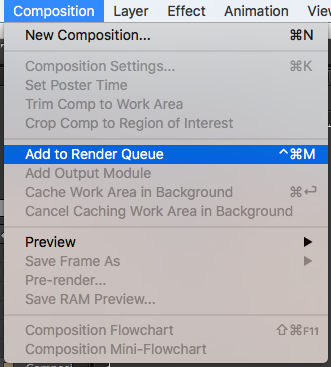
Step 2: Select "Composition" in top menu bar
Click on "Add to Render Queue"
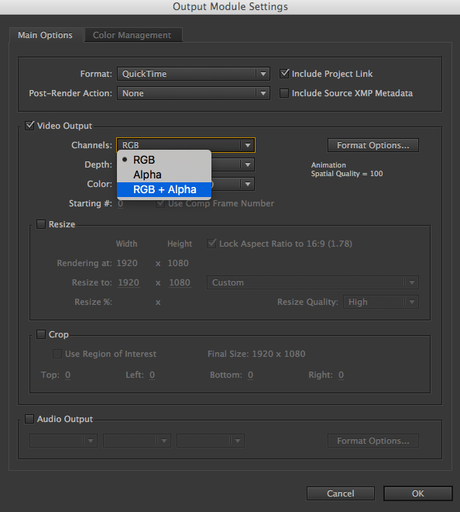
Step 3: Bottom of the screen where the layers normally appear
Click on "Output Module"
Make sure the format selected is "Lossless"
Click on "Lossless"
Click on "Output Module"
Make sure the format selected is "Lossless"
Click on "Lossless"

Step 4: Click on "Lossless"
Make sure Format is "Quicktime"
Click on "Channels" dropdown
Select "RGB + Alpha" and click OK
Make sure Format is "Quicktime"
Click on "Channels" dropdown
Select "RGB + Alpha" and click OK
Step 5: Select file name and save location
Click on "Output To:"
Enter student name_project name
Save in Your student folder
Click on "Output To:"
Enter student name_project name
Save in Your student folder

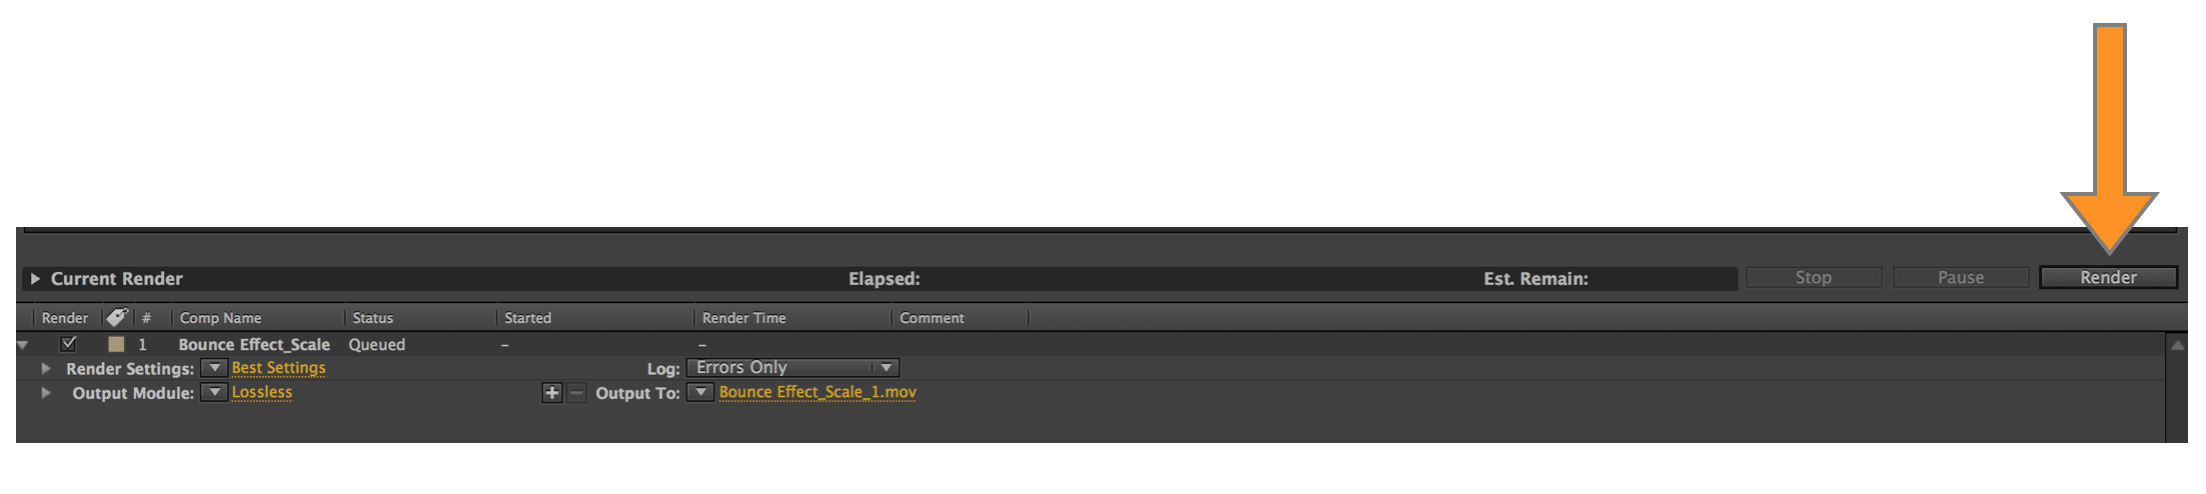
Step 6: Click on Render to create the video file
Step 7: Play your video file
Locate the saved video file on your hard drive and play it in VLC
Confirm it is playing the entire animation as expected
Locate the saved video file on your hard drive and play it in VLC
Confirm it is playing the entire animation as expected
