Gr. 11
Introduction to Photoshop/Photopea
This grade 11 unit will explore more advanced image editing techniques that builds on previous knowledge.
All students can be successful no matter their level of knowledge and skill as they begin this unit. All students will be supported by the teacher and video tutorials demonstrating a variety of image editing techniques.
In this unit students will produce creative Static Graphics given the online status of the course. Projects will develop and extend the students' graphic design skills. The unit focuses on image editing and creative graphic creation using industry standard Photoshop/Photopea.
This unit will build student Photo image editing skills. Students can use either Photoshop or Photopea.com to complete these assignments. Photopea is a free online program that works almost identical to Photoshop. The tools of both programs are essentially the same and the assignments can be completed with either program.
Photopea.com - you can download and install or work right from within your internet browser. Google Chrome is best used as your browser for this course as it will mirror the browser your teacher will use.
Photopea is compatible with PC, MAC and Google Chromebooks.
PC vs. Mac Keyboard Reminder
Mac - Cmd (Command) = Windows PC - Ctrl (Control)
Mac - Cmd (Command) = Windows PC - Ctrl (Control)
Downloading Images from the Internet
Select/Create a folder for downloaded files
|
|
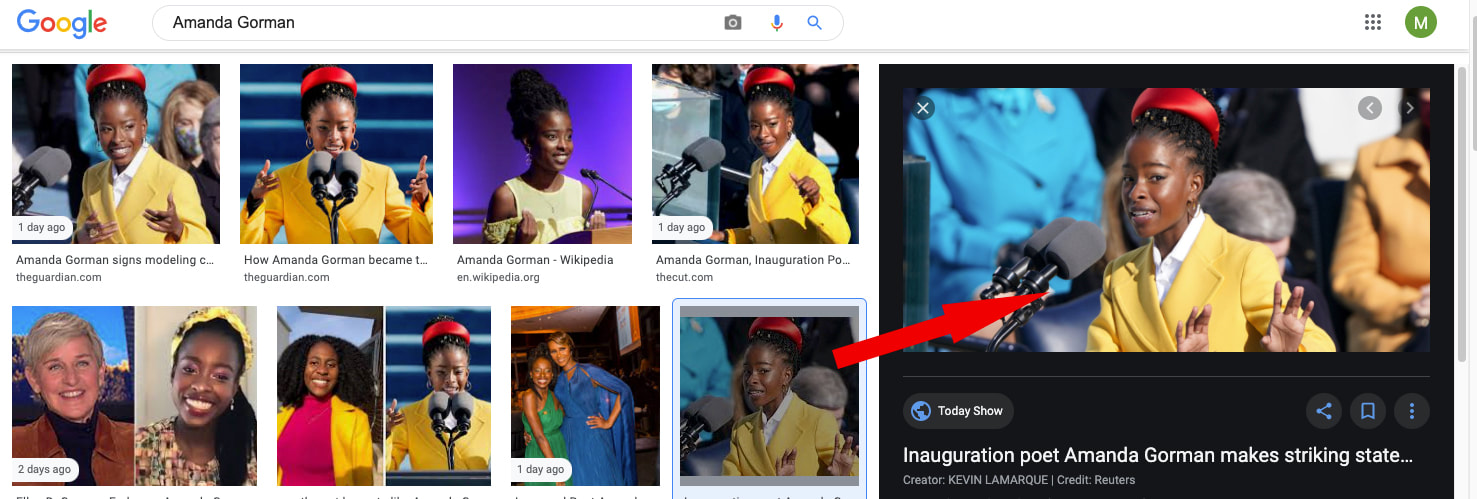
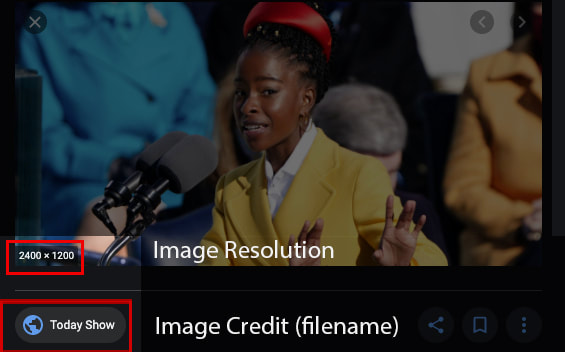
Download High Resolution Images
|
Screenshots
|
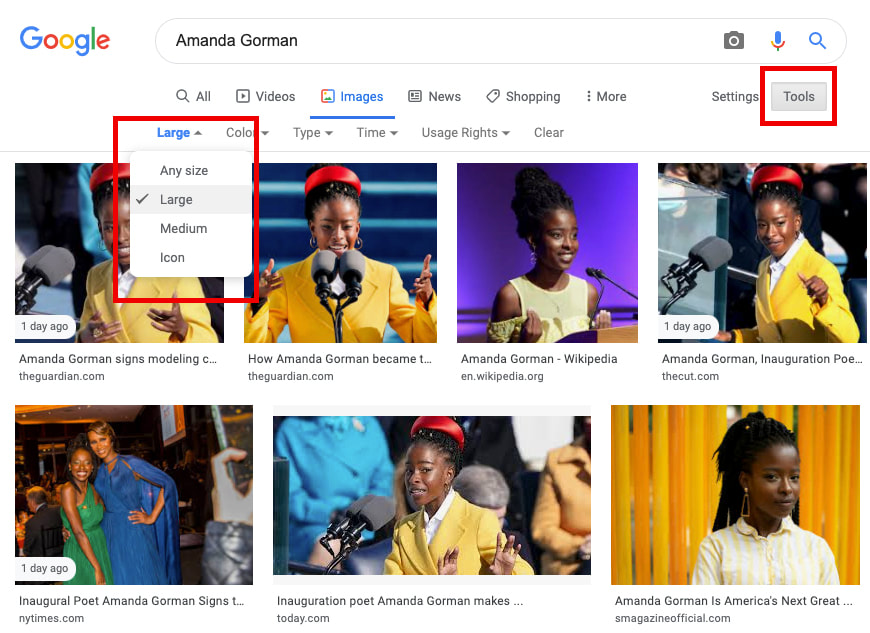
Browser Settings for "Large" High Resolution Images
|
|
|
|
|
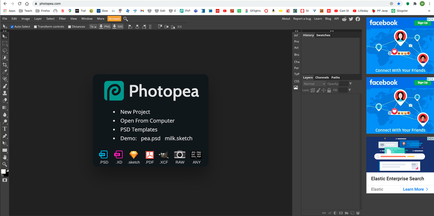
Photopea - Let's get Started!
|
|
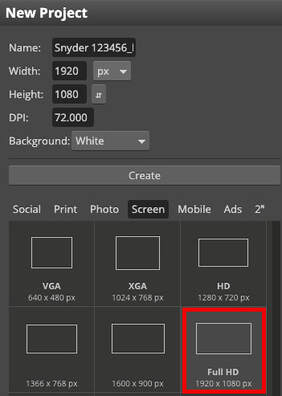
Creating a New Project File
|
|
Sources: Todays Tuts
https://www.youtube.com/watch?v=4pfdGEnFtUU |
Additional Getting Started Tutorial |
Photopea Getting Started Screenshots
|
Creating New Project - Using Google Chrome Browser
|
|
New Project settings
Photoshop or Photopea
|
Common Computer File Types
Graphic Types
Some technical information you need to know!
Some technical information you need to know!
|
|
Smart Object
Created when Images are first placed Links to original Image on computer Retrieves pixel from original image as it scaled up and down Raster Graphic - Image Images must be "rasterized" to be able to edit after placing Connection to original pixels on computer is lost As image is scaled up and down pixel are discarded or artificially generated Limited scaling of image should be done to preserve quality Quality loss shows as blurriness and pixilation Vector Graphic Shapes and text created in Photoshop and Photopea Mathematically generated "Scalable" - can be scaled up and down to any size over multiple transformations WITHOUT ANY quality loss If ever "rasterized" they have the same limits as a rasterized image Text is sometimes rasterized so it can be transformed to shapes |
|
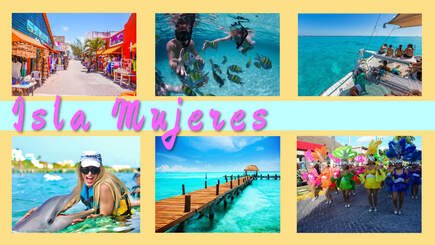
Photo Collage Assignment
This is a long tutorial as it covers a lot of interconnected skills - It is recommended that you watch it in chunks then do some work on the techniques that were covered. Then proceed with the video and work your way through your own project.
Have fun!
This is a long tutorial as it covers a lot of interconnected skills - It is recommended that you watch it in chunks then do some work on the techniques that were covered. Then proceed with the video and work your way through your own project.
Have fun!
Collage Assignment
|
|
Working with images and layers
|
Working with Layers
|
|
Layers
|
Working with the Shape Tool
|
|
Shapes - Vector graphics
|
Working with colours - a review of key concepts
Red, Green & Blue are the Primary colours for computer screen and televisions
Mixed together they create white - This is the additive colour model
Mixed together they create white - This is the additive colour model
|
|
Colour Principles
|
|
|
Phlearn Tutorial using adobe.color.com
Choosing complimentary colours for a design Objective in the collage project is to select 3 colours to create a colour scheme where the 3 colours combine well on the design. This is called "Colour Harmony" in a design.
|
Introduction to Typography
"The style or appearance of text" - GCFLearnFree.org
Selecting the "correct" typefaces or fonts can be difficult. Like colour, fonts communicate a message or a feeling in a design. There are hundreds of font styles available and that can make the decision overwhelming.
Golden Rule: KIS - Keep it Simple!
1 or 2 fonts in any one design - depending on the complexity of the design
The font needs to reflect the message and feeling of the overall design
Visually the font style should not draw the attention of the design but enhance it
This video is a nice introduction to the art of Typography
|
|
Typography - The art of working with text
|
Elevating use of Typography in design
Shawn Berry is a talented Owner and Creative Director of his own "Boutique" (small and focussed) company in Toronto. He has generously created a series of design tutorials sharing his knowledge and industry experience. He is well worth following for those interested in diving deeper into creative graphic design.
Shawn Berry is a talented Owner and Creative Director of his own "Boutique" (small and focussed) company in Toronto. He has generously created a series of design tutorials sharing his knowledge and industry experience. He is well worth following for those interested in diving deeper into creative graphic design.
|
|
Working Professional Viewpoint on use of Typograghy
|
Adding a Custom font to your design choices!
Dafont.com is a fantastic free custom font download site. Most of the fonts are available for free download.
Explore the site by keywords that express the feeling you are looking for.
Dafont.com is a fantastic free custom font download site. Most of the fonts are available for free download.
Explore the site by keywords that express the feeling you are looking for.
|
Downloading custom fonts from Dafont.com
|
Summary of our Conceptual Learning
The collage project has asked you to apply these design concepts. By creating your own design you should have an understanding of these design concepts and how they impacted your design decisions.
The collage project has asked you to apply these design concepts. By creating your own design you should have an understanding of these design concepts and how they impacted your design decisions.
|
|
Our Journey through the Collage Project
|
Photo Collage Submission
Due: Feb 18 end of class
Collage Requirements:
Submit 3 files:
**Note: A reflection on student learning with screenshots will be included on their Personal Portfolio website
Due: Feb 18 end of class
Collage Requirements:
- Theme based concept - 6 images - careful attention to placement and alignment (layout) - balanced and unified layout
- 3 colours that achieve "colour harmony" - Titlebar, canvas BG and Text
- Effective use of Typography that communicates the the visual message/theme - font style and colours work in harmony with overall design
- Must provide a for the images used in the collage
Submit 3 files:
- .psd Photopea project file - with all layers available
- .jpg. (max. quality 12) which is an image without layers
**Note: A reflection on student learning with screenshots will be included on their Personal Portfolio website
Clipping Mask
Place images inside text
Place images inside text
|
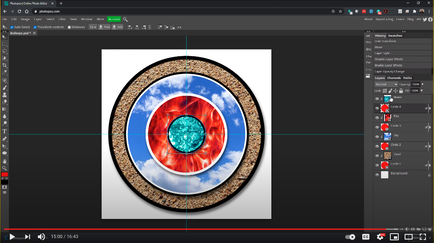
Bullseye Project Skills
|
Assignment
Create a Bullseye - Use your own downloaded Images
Photo Composite using Shapes and images
Source: Sean Glumace
Create a Bullseye - Use your own downloaded Images
Photo Composite using Shapes and images
Source: Sean Glumace
|
|
Skills building - Workspace and Tools
Skills include
Submission: to class Brightspace Assignment folder Save and Submit 3 Files:
Student firstname_student number_project name (include final version number (write final) |
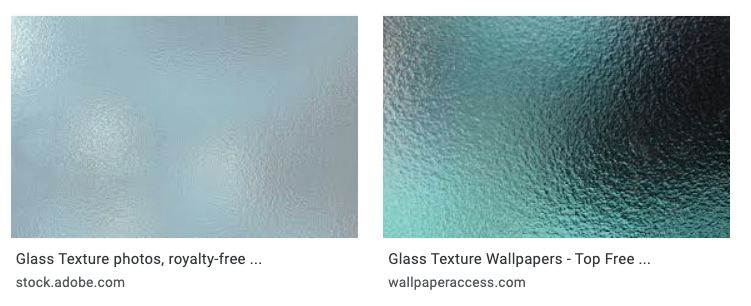
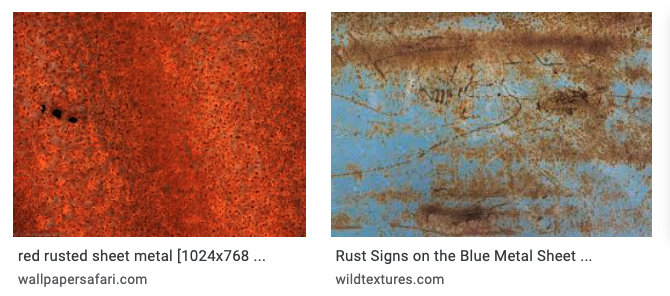
Texture Images
Explore and download for Bullseye
Explore and download for Bullseye
Clipping Mask Step by Step
|
|
Adding a texture or image into text (or any vector shape)
|
Consider using texture images searched from the internet
Be sure to include copyright source
Be sure to include copyright source
Tools to extract an object or person from a background
Selection Tools:
Magic Wand
Quick Selection Tool
Adding a Raster Mask
Selection Tools:
Magic Wand
Quick Selection Tool
Adding a Raster Mask
|
|
Magic Wand vs. Quick Selection Tool
|
Excellent Practice Exercise
Files provided below video
Files provided below video
|
Download Images
Source: Pexels.com
|
Magic Wand & Quick Selection Tools
Remove a Background from an image
| ||||||||||||
Refine Edge
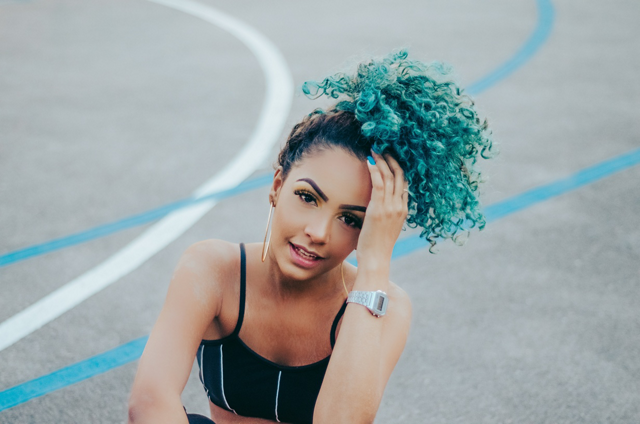
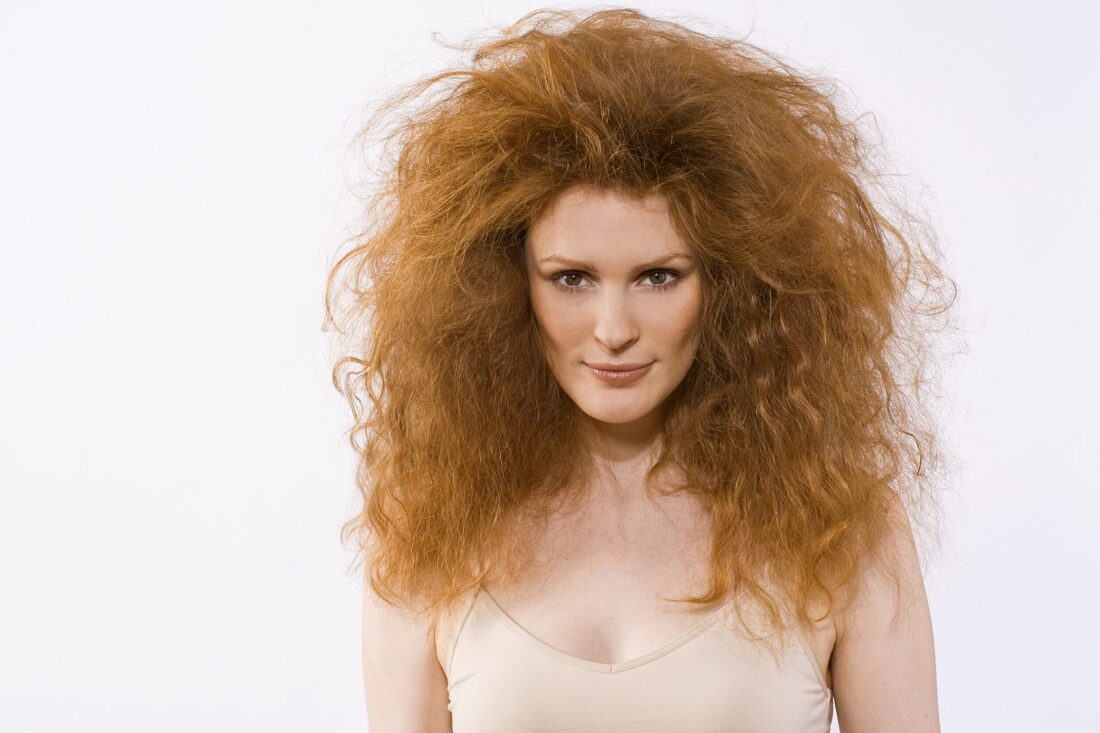
Cut out Frizzy hair - Practice images
Cut out Frizzy hair - Practice images
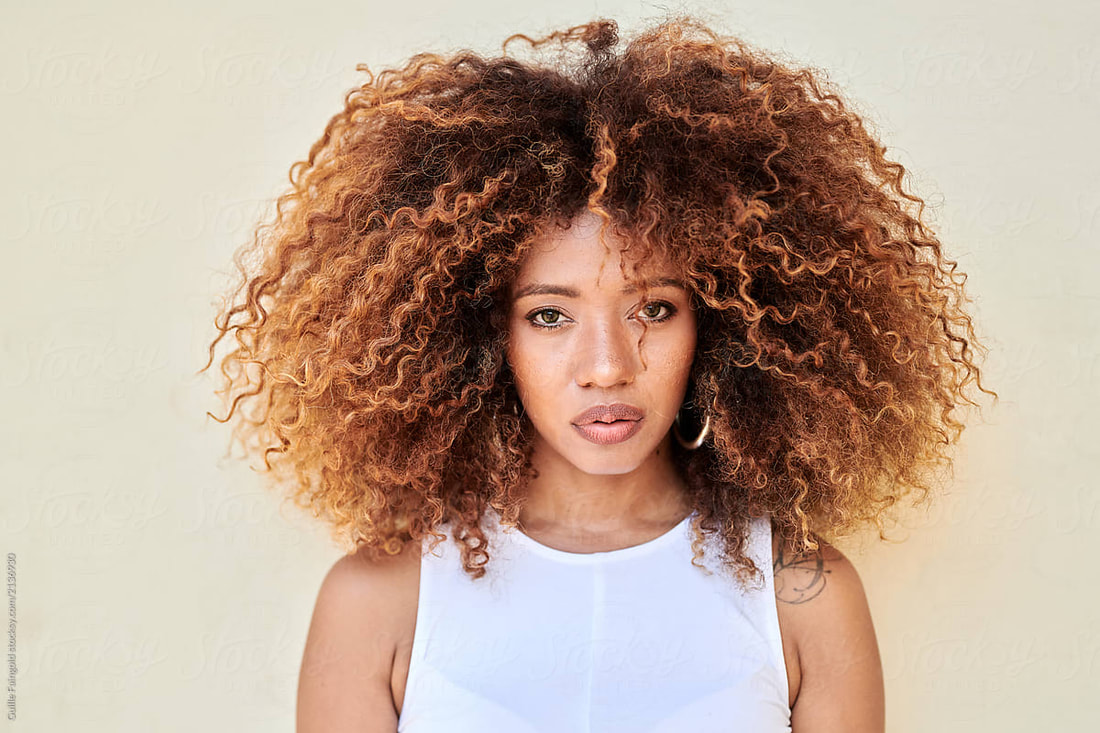
Source: Stocksy United
|
Source: Southern Living

| ||||||||||||
Review: Layer Mask - Non Destructive Editing
Non Destructive image editing - Layer masks on layer
Called Raster mask as it is applied to a rasterized layer
First 16 mins reviews layer masks
Non Destructive image editing - Layer masks on layer
Called Raster mask as it is applied to a rasterized layer
First 16 mins reviews layer masks
|
|
Intro to Masking in Photopea
Destructive vs. non-destructive editing Adding a Raster mask to an image layer Paint on mask thumbnail Black conceals/white reveals Grey is partially transparent |
|
|
Creative use of Raster Masks
|
The Pen Tool
A tricky tool that takes Practice!
Make complex selections for cut out
Custom Shapes
Trace images to Create a vector image
A tricky tool that takes Practice!
Make complex selections for cut out
Custom Shapes
Trace images to Create a vector image
|
Using the Pen tool to trace
Creates an editable vector graphic 4 Different shapes - Red/Blue/Orange/Text Trace by lowering opacity Fill each traced shape with exact colour by sampling in colour picker | ||
|
|
Pen Tool
Adding anchor points Deleting anchor points |
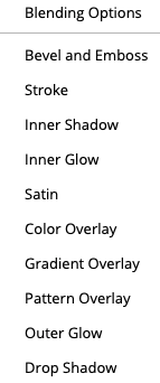
Layer Styles Vs. Filters
Non-destructive vs. destructive
Non-destructive vs. destructive
|
Layer Style
Non-destructive Can edit anytime |
|
Filters examples
Destructive Can only undo - permanent after closing |

|
Source: GCFLearnFree.org
Negative Space
Create a Photopea account
Photopea.com
Sign up - Use your school student email to sign up
Do not provide any personal information address/phone numbers/school attending if requested
it is a simple process and once signed up you are ready to use the program for free
Photopea.com
Sign up - Use your school student email to sign up
Do not provide any personal information address/phone numbers/school attending if requested
it is a simple process and once signed up you are ready to use the program for free
How do I apply a clipping mask to multiple layers?
Hold down Alt (Option in Mac OS), position the pointer over the line separating two grouped layers in the Layers panel (the pointer changes to two overlapping circles), and click. In the Layers panel, select a layer in the clipping mask, and choose Layer > Release Clipping Mask.
Hold down Alt (Option in Mac OS), position the pointer over the line separating two grouped layers in the Layers panel (the pointer changes to two overlapping circles), and click. In the Layers panel, select a layer in the clipping mask, and choose Layer > Release Clipping Mask.
Working with Shapes - Pen Tool
Text to Shape
You can convert any text layer into a vector shape layer by right-clicking it (in Layers panel) and pressing Convert to Shape. Each character will become a path with knots, which you can modify manually (e.g. rotate each character by a random angle).
You can convert any text layer into a vector shape layer by right-clicking it (in Layers panel) and pressing Convert to Shape. Each character will become a path with knots, which you can modify manually (e.g. rotate each character by a random angle).
Path selection Tool
Path select allows us to manupulate paths within a shape. Click on the path to select it, or hold Shift to select multiple paths.
When one or more paths are selected, we can:
Path select allows us to manupulate paths within a shape. Click on the path to select it, or hold Shift to select multiple paths.
When one or more paths are selected, we can:
- move them with a mouse or cursor keys
- delete them by pressing Delete
- Cut / Copy / Paste paths using Edit - Cut / Copy / Paste (or Ctrl + X / C / V), even between different layers or different PSDs
- apply Free Transform (Edit - Free Transform)
Direct Selection Tool
Direct select allows us to manupulate knots within a shape. Click on the outline of the path to see the knots. Then click on a knot, or hold Shift to select multiple knots. We can even select separate knots from different paths.
When one or more knots are selected, we can:
Direct select allows us to manupulate knots within a shape. Click on the outline of the path to see the knots. Then click on a knot, or hold Shift to select multiple knots. We can even select separate knots from different paths.
When one or more knots are selected, we can:
- move them with a mouse or cursor keys
- delete them by pressing Delete
- move the anchor or handles of a knot
